Gravestone Goodies: Kitchen Craft For Kids
- jessicazornes
- Oct 29, 2025
- 3 min read

Graving Something Sweet?
As homeschoolers, we've explored some seemingly unusual topics.
From shoes to waffles; and ornaments to cheeseburgers; we stop at nothing to learn all we can from whatever we can. Our lesson about gravestones was no exception, and with all that learning came a much needed brain break. I got digging into our ingredients and carved out a unique and engaging kitchen creation themed upon gravestones.
Whether you are in your own unusual homeschool lesson, or looking for some festive food crafts, this creation stands tall amongst them all!
Grab your crafty kiddos and get hands-on with the fun and easy,
Gravestone Goodies.
Looking For More Great Kitchen Crafts?
Get My "14 Easy Kitchen Creation For Kids" book! Available Now On Amazon.

GRAVESTONE GOODIES
What You'll Need:
Wafer Cookies
Candy Melts (black and white)
Trail Mix (or other desired filling)
Parchment paper
Food marker
Toothpick
Optional display ingredients:
Graham crackers
Silver dusting powder

LET'S MAKE IT:
Step 1: Lay out a long section of parchment paper over the work surface.
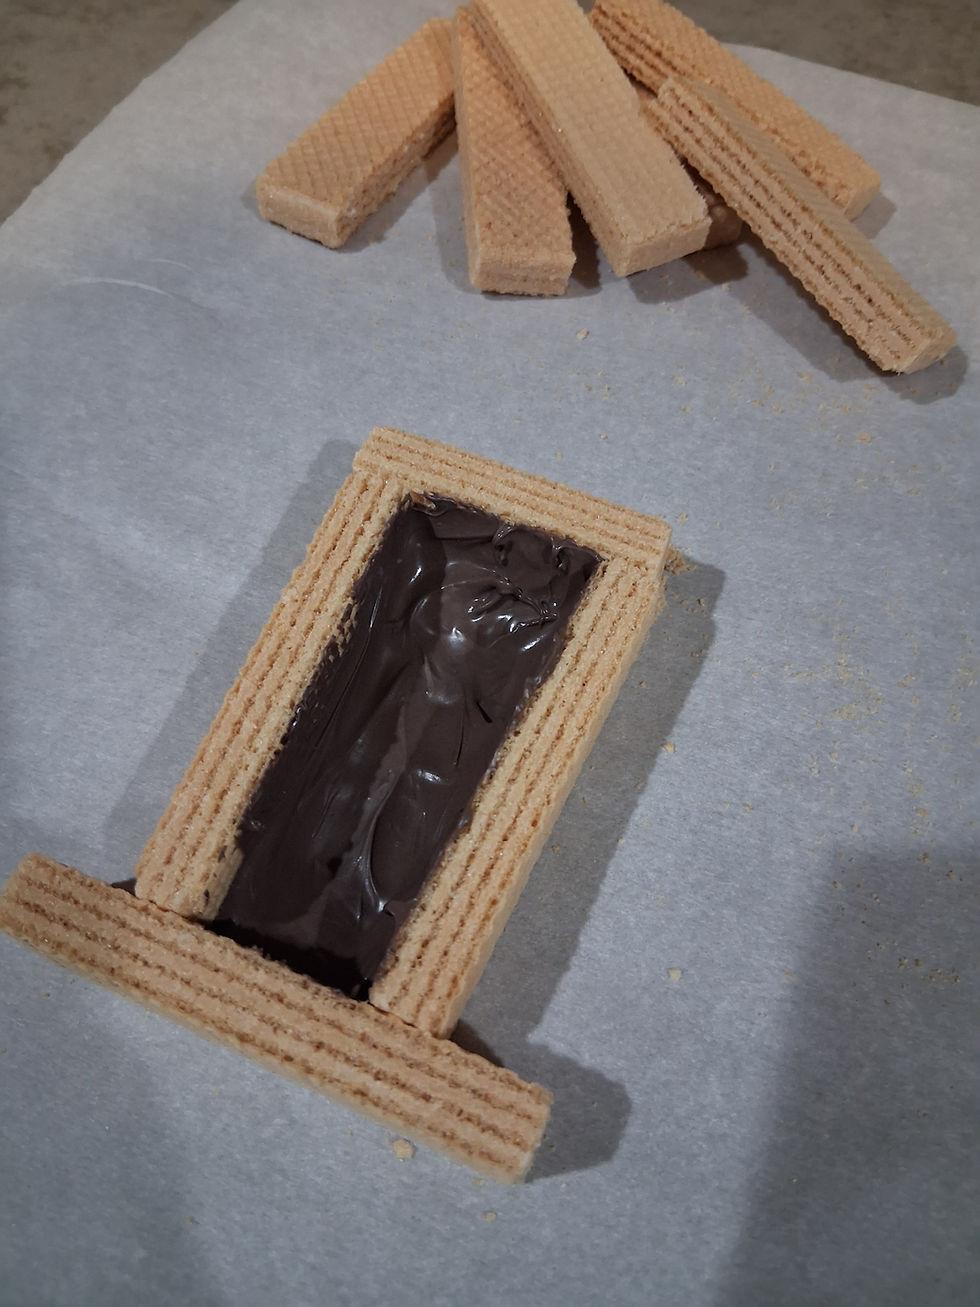
Step 2: Design your gravestone shape. Turn the wafer cookies on their sides. Place one full wafer cookie on its side as the bottom/base of the gravestone. Lay out the next wafers on their sides, and place them against the bottom wafer, forming the sides of the gravestone. If desired, trim down the wafer length in order to create a specialty shape, or a shorter gravestone. Place another wafer cookie along the top, against the tops of the side pieces, trimming off the excess ends if needed to form the gravestone shape you desire.


Step 3: Ensure all the corners of the wafers are touching each other.
Step 4: In a microwavable bowl, add in the black candy melts. Add in a smaller amount of white candy melts to the bowl. Heat the candies until they have melted. Carefully remove the bowl from the microwave.
Step 5: Add spoonfuls of the melted candy to the inner area of the wafer gravestone. Spread the chocolate in a thin, smooth layer inside the gravestone, and up along the sides of the wafers. Allow the gravestone to set until the candy has hardened.


Step 6: Make the front of the gravestone. Lay out another small section of parchment paper. Once the candy on the gravestone has hardened, move the gravestone to the parchment paper. Use a food marker to trace the gravestone shape onto the parchment paper. Set aside the gravestone so that you can now see the outline you traced.

Step 7: Spoon in the melted candy directly onto the parchment paper filling the shape you have traced.
Step 8: Once the candy has nearly hardened, use a toothpick to etch in the design or letters for the front of the gravestone (ex. R.I.P.). Once done, allow the candy to completely harden.


Step 9: Once the candy has hardened, use a sharp knife to trim along the edges of the front piece, so that all its edges are smooth.
Step 10: Fill the hollow cavity of the gravestone with trail mix (or other chosen filler).

Step 11: Add melted candy to the top edges of the gravestone, then carefully add the top candy layer to the gravestone, sealing in the filling inside. Allow the remaining melted candy to harden before moving the gravestone.
Step 12: As an optional display, fill a tray with crush up graham crackers, then stand up the gravestones in the graham crackers. Spray dusting powder over each gravestone.
TO ENJOY: Serve the gravestone on a plate with a spoon to enjoy crushing/breaking open the front of the gravestone revealing all the goodies inside.

THERE'S MORE TO UNCOVER!
FIND MORE CRAFTS AND CREATIONS HERE!


Comments